If you use WordPress as a headless CMS with Next.js, sooner or later you will need to fetch private data. Maybe it is draft posts, a preview page, or content only logged in users should see. Public data works without any login, but private data needs authentication.
In this guide I will show you how to set up auth for WPGraphQL and how to use your credentials safely inside Next.js. I will keep it simple and go one step at a time.
What You Need Before You Start
A WordPress site running on HTTPS
The WPGraphQL plugin installed and active
A Next.js project (App Router in this guide)
Basic knowledge of fetch and environment variables
Step 1: Install and Check WPGraphQL
In your WordPress dashboard, go to Plugins, then Add New, and search for WPGraphQL. Install it and click Activate.
After that, you will see a new GraphQL menu in the sidebar. Your endpoint will be:
https://yourdomain.com/graphql
Open the GraphiQL IDE from the GraphQL menu and run a simple query to confirm everything works.
Step 2: Create an Application Password
This is built into WordPress. It is the easiest choice when your Next.js server needs to talk to WordPress, for example to read drafts. Think of it as your API key.
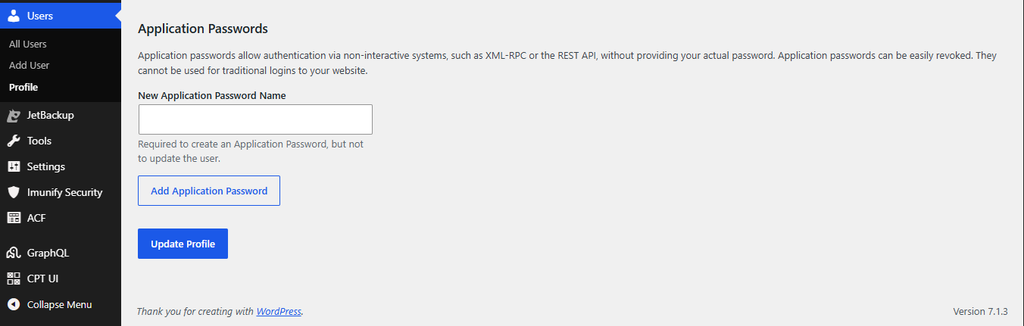
In WordPress, go to Users, then Profile
Scroll down to the Application Passwords section
Type a name like “Nextjs Frontend”
Click Add New Application Password
Copy the password right away. WordPress shows it only once
A tip from experience: create a separate user with only the role it needs, like Editor, instead of using your admin account. If the key ever leaks, the damage stays small.
Step 4: Store the Credentials in Environment Variables
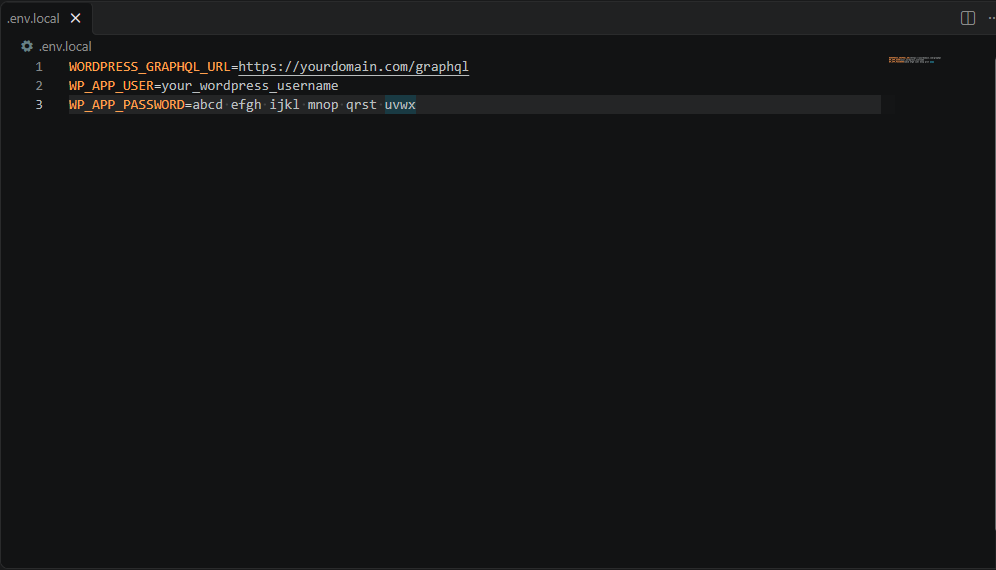
In the root of your Next.js project, open the .env.local file and add:
Very important: do not add the NEXT_PUBLIC_ prefix to these names. Any variable with that prefix gets sent to the browser, and anyone can see it. Without the prefix, the value stays on the server only.
Also make sure .env.local is listed in your .gitignore file so it never goes to GitHub.
Step 5: Create a Helper Function for API Calls
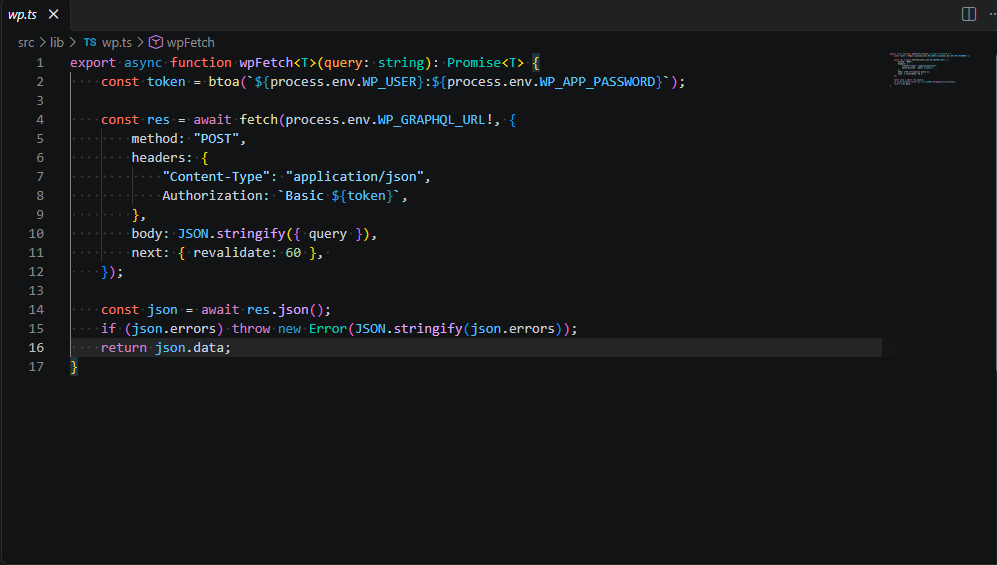
Instead of writing the same fetch code again and again, make one helper. Create a file at lib/wp.js:
This is a Server Component, so the API call runs on the server. Your password never reaches the browser. If you run the same query without the auth header, WordPress returns an empty list. With the header, you see your drafts. That is how you know auth is working.
Common Mistakes to Avoid
Using NEXT_PUBLIC_ on secret values
Using an admin account when an Editor account is enough
Running your site on HTTP. Application Passwords need HTTPS on live sites
Forgetting to add .env.local to .gitignore
Calling private queries from client components, which exposes your keys
Final Thoughts
Setting up auth for WordPress GraphQL is not hard once you know the flow. Create an application password, keep it in a server only environment variable, send it in the Authorization header, and always make private calls from the server side of Next.js. If you need user logins, add JWT on top.
I hope this guide saved you some time. If you get stuck on any step, leave a comment and I will try to help.
You build a login system. It works perfectly on your laptop. Then you deploy the React app to Vercel and the Express API to Render, and suddenly nobody can stay logged in. The login request returns 200, but the next request returns 401.
If your MERN cookies are not working in production, you are not alone. This is one of the most common problems after a first deployment. The good news is that it always comes down to a few settings. In this post I will show you why it happens and how I fix it step by step.
Why cookies work on localhost but not in production
On your machine, the frontend runs on localhost:5173 and the backend runs on localhost:5000. Browsers do not care about ports when they decide if two URLs are on the same site. So both are the same site, and cookies flow freely.
After deployment, your URLs look like this:
Frontend: myapp.vercel.app
Backend: myapp-api.onrender.com
These are two different sites. Both vercel.app and onrender.com are on the public suffix list, so every project under them counts as its own site. Now your API cookie is a third-party cookie, and browsers treat it very differently.
How to check what is broken
Before you change any code, open DevTools and look at two things:
Go to the Network tab, click your login request, and check the response headers for Set-Cookie.
Go to the Application tab, open Cookies, and see if your cookie was saved.
Here is how to read what you see:
What you see
Likely cause
No Set-Cookie header at all
Wrong secure setting, missing trust proxy, or a CORS block
Set-Cookie has a warning icon
SameSite=None is used without Secure, or the browser blocked it
Cookie is saved but not sent on the next request
withCredentials is missing on the client
CORS error that mentions credentials
Wildcard origin or credentials: true is missing
Step 1: Set the right cookie options on the server
For a cross-site setup, your cookie needs HttpOnly, Secure and SameSite=None. I keep these in one file so login and logout always use the same values.
Browsers reject SameSite=None if the cookie is not also Secure. That is why I only turn it on in production. On localhost over plain HTTP, lax works fine.
Also make sure NODE_ENV is really set to production on your hosting dashboard. If it is missing, your app will silently use the development values.
Render, Railway and most hosts put a proxy in front of your app. The proxy handles HTTPS, then passes plain HTTP to Express. Because of this, Express may think the request is not secure, and libraries like express-session will refuse to set a secure cookie.
Fix it with one line, placed before your other middleware:
app.set("trust proxy", 1);
This tells Express to read the X-Forwarded-Proto header from the proxy, so req.secure becomes true.
Step 3: Set up CORS with credentials
Your API must allow your exact frontend origin and allow credentials. This is the full server setup:
import express from "express";
import cors from "cors";
import cookieParser from "cookie-parser";

const app = express();

app.set("trust proxy", 1);

app.use(
  cors({
    origin: process.env.CLIENT_URL, // https://myapp.vercel.app
    credentials: true,
  })
);

app.use(express.json());
app.use(cookieParser());
These are the mistakes I see most often:
Using origin: "*" together with credentials: true. Browsers reject this.
Adding a trailing slash, like https://myapp.vercel.app/. The origin must match exactly.
Forgetting to add CLIENT_URL in the hosting dashboard.
Placing cors() after your routes instead of before them.
Step 4: Send credentials from the frontend
Even if the server is perfect, the browser will not send cookies unless you ask it to. With Axios, set withCredentials once on your instance:
// src/lib/api.js
import axios from "axios";

export const api = axios.create({
  baseURL: import.meta.env.VITE_API_URL,
  withCredentials: true,
});
A cookie is only removed if the clear options match the options used to set it. Do not pass maxAge when clearing, because it can stop the cookie from being deleted.
The problem that config alone cannot fix: blocked third-party cookies
You can do everything above and still see broken logins for some users. Safari blocks third-party cookies by default. Firefox isolates them per site. Chrome blocks them in Incognito mode and when users turn on the setting.
So a cross-site cookie setup works for you in Chrome, then fails for a client on an iPhone. This is why I do not rely on cross-site cookies for real projects. There are three better options.
Option 1: Use one domain for both apps (best option)
Put your frontend and backend on subdomains of the same domain:
app.yourdomain.com for the frontend
api.yourdomain.com for the backend
These are the same site, so the browser treats your cookie as first-party. You can then use sameSite: "lax" and it works in every browser. Both Vercel and Render support custom domains.
Option 2: Proxy API calls through Vercel
If you cannot use a custom domain yet, use Vercel rewrites. The browser talks only to your Vercel domain, and Vercel forwards the request to your API. Add this to vercel.json:
Then set VITE_API_URL=/api in your frontend environment. Every request now looks same-origin, and the cookie becomes first-party. One thing to know: this works for normal REST calls, but WebSocket connections need to go straight to the backend, so real-time features can still run into cookie problems.
Option 3: Add the Partitioned attribute (CHIPS)
CHIPS (Cookies Having Independent Partitioned State) lets a cross-site cookie work in supporting browsers, as long as it is stored per top-level site. You add one option:
It needs secure: true and sameSite: "none", and you should use a recent Express version. It mainly helps Chromium browsers, and it does not solve the Safari problem. I treat it as a backup, not the main fix.
Do not forget CSRF
When you use SameSite=None, you lose some of the built-in protection against CSRF attacks. If your app changes data with cookie auth, add a CSRF token, or at least check the Origin header on write requests. Using a same-site setup like Option 1 avoids this problem entirely.
Quick checklist
Run through this list before you spend hours debugging:
NODE_ENV is set to production on the server
Cookie has httpOnly: true, secure: true and sameSite: "none" in production
app.set("trust proxy", 1) is added before other middleware
CORS uses the exact frontend URL, with no trailing slash and no *
CORS has credentials: true
Axios has withCredentials: true, or Fetch has credentials: "include"
Logout uses the same cookie options, without maxAge
Why do my cookies work in Postman but not in the browser?
Postman does not enforce SameSite rules or CORS. It only proves your API logic works. Browsers add extra security checks, so a request can pass in Postman and still fail in the browser.
Should I use localStorage instead of cookies?
It avoids the cross-site problem, but any script on your page can read localStorage, so an XSS bug can leak the token. An HttpOnly cookie is safer for auth tokens. I prefer to fix the cookie setup instead of moving the token to localStorage.
Does SameSite=Strict work when the frontend and backend are on different domains?
No. Strict blocks the cookie on all cross-site requests. For separate domains you need None, or better, move both apps under one parent domain and use Lax.
Why does my cookie disappear only on iPhones?
Safari blocks third-party cookies by default. The fix is to make your API same-site with a custom domain or a proxy, not to change cookie flags.
Final thoughts
Most MERN cookie problems in production come from one idea: on localhost your apps share a site, and after deployment they do not. Set the correct cookie flags, trust the proxy, configure CORS with credentials, and send credentials from the client. Then, for a setup that works in every browser, move your frontend and API under the same domain.
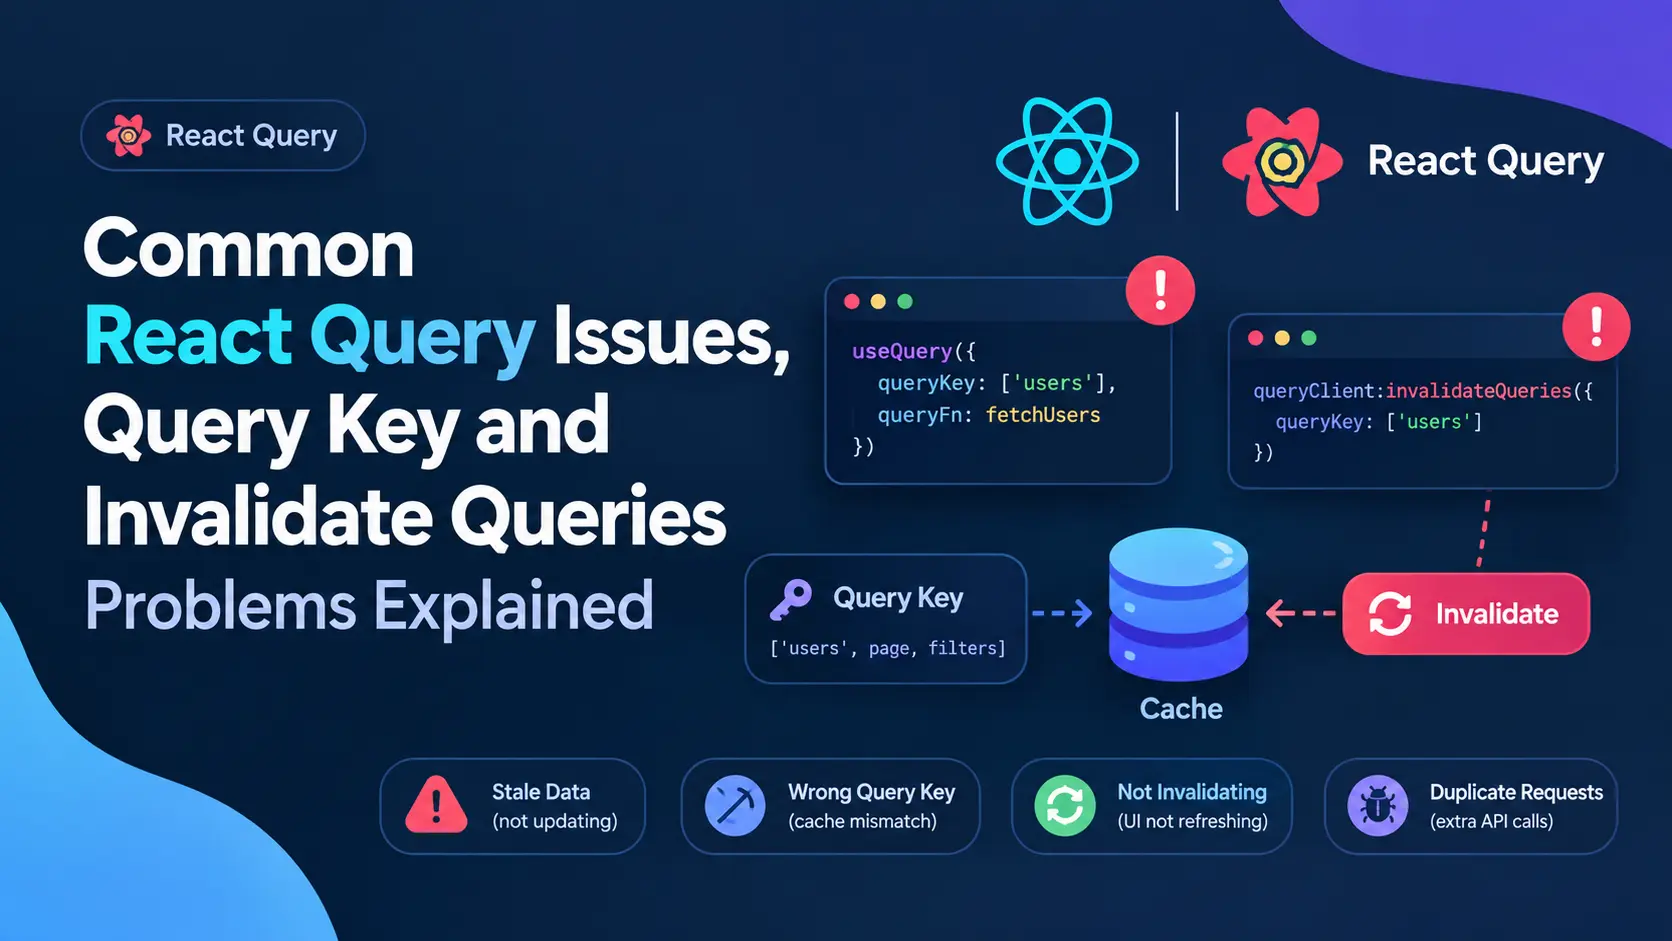
React query fixes a lot of problems that come with useEffect based fetching, i already wrote about that in my last post. But once you start using it in real projects you run into a new set of issues, mostly around query keys and invalidation. Most of these bugs happen not because react query is broken, but because the query key was not passed correctly.
In this post im going through the most common issues i faced and how i fixed them, with actual code examples for pagination, update and delete cases.
The Root Cause, Query Keys Not Matching
React query uses query keys to decide what data belongs to what. If your key doesnt match exactly, invalidation just silently fails, no error, no warning, it just wont refetch and you spend an hour wondering why.
Here is a mistake i see a lot.
// fetching data
useQuery(['users', page], () => fetchUsers(page));

// trying to invalidate later
queryClient.invalidateQueries(['users']);
This actually works fine because react query does partial matching by default, ['users'] will match ['users', page] too. But the problem starts when people do something like this.
Now this wont match properly because the object in the key is different, react query compares keys deeply but the shape has to line up close enough, and a lot of devs pass half the params during invalidate which just doesnt match the original key structure. Always keep your key structure consistent, dont randomly leave out params when invalidating.
Case 1, Pagination Query Not Refetching After Invalidate
This is probably the most common issue people ask me about. You have a paginated list, you invalidate the query after some action, but only the current page refetches or sometime nothing happens at all.
If you only call queryClient.invalidateQueries(['users']) this should actually invalidate all pages since react query matches by prefix. But if somewhere else in your app you fetch users with a slightly different key, like ['usersList', page] in one component and ['users', page] in another, invalidate wont touch both. Keep one single source of truth for your keys, i usually make a small keys file for this.
Now everywhere i fetch or invalidate i use this same function, no typos, no mismatch.
Case 2, Invalidating Pagination and Detail Query After Update
Let say you have a user detail page and a user list page with pagination. User updates their profile from detail page, now you need both the detail query and the list query to reflect new data.
Notice i invalidate the detail query with the exact id, and the list query using the base key userKeys.all which is ['users']. Since this is a prefix of ['users', page], all pages of the paginated list get invalidated too, no matter what page number they are on. This is the part people usually miss, they only invalidate the current page key like ['users', 1] and forget the user might be sitting on page 3 when the update happened.
Case 3, Delete Should Invalidate the List, Not the Detail
When you delete something, there is no detail query left to invalidate really, the item is gone. What you need is to refresh the list so the deleted item disappears from pagination.
One thing to watch here, if you are on the last page of pagination and you delete the last item on that page, invalidate alone wont fix an empty page issue, you might need to also check if current page has data after refetch and move user back a page if its empty. Thats more of a ui logic thing but it trips people up because they assume invalidate handles everything automatically.
Cache Issues I Ran Into
Stale data showing up for a second before refetch This happens because react query shows cached data first then refetches in background. Its actually expected behavior, not a bug, but if you dont want any stale flash you can set staleTime: 0 for that specific query, though this brings back extra network calls so use it carefully.
Refetch on window focus causing unwanted calls By default react query refetches when user switches back to the tab. On some pages this is not needed, specially if data rarely changes, you can turn it off per query.
Old cache showing after logout and login with different user This one bit me once. If you dont clear the query client on logout, next user sometime sees cached data from previous user for a split second. Fix is simple, just call queryClient.clear() on logout.
Most react query problems i debugged over time werent actually about the library, they were about query keys not being consistent across the app. Once you centralize your keys and understand how prefix matching works for invalidation, most of these invalidate issues go away on their own.
If you’re working on a react or next js project and running into similar caching or invalidation bugs, feel free to reach out, i work as a full stack mern and next js developer and i deal with these exact issues regularly while building dashboards and saas platforms. You can check my work at Mern Stack Developer Project.